How to map an effect and assign a controller in Logic Pro X
Logic Pro X offers powerful, almost unlimited possibilities in music production. It is certainly one of the most versatile and advanced DAWs available on the market.
This has its pros and cons. What is impossible in other DAWs is almost always possible in Logic Pro. However, what is relatively simple in other products, is often too complicated and difficult in Logic. This sounds quite controversial in relation to a product by Apple, but it is based on the experience of many musicians and producers.
One of the non-intuitive and confusing things is configuring external MIDI controllers – assigning and mapping MIDI events to effects.
This can be done in several ways. On the one hand, it’s good because it provides a lot of flexibility. However, it requires the user to spend time learning too much unnecessary information.
Key Commands
They refer to global commands as well as windows and menus. Basically, it’s a place where you can assign specific commands not only to a keyboard shortcut, but also to an external MIDI controller.
So, if you want to start recording or playing a track by pressing a button on the controller, then this is the place to set it.
How can this be done? Very simply.
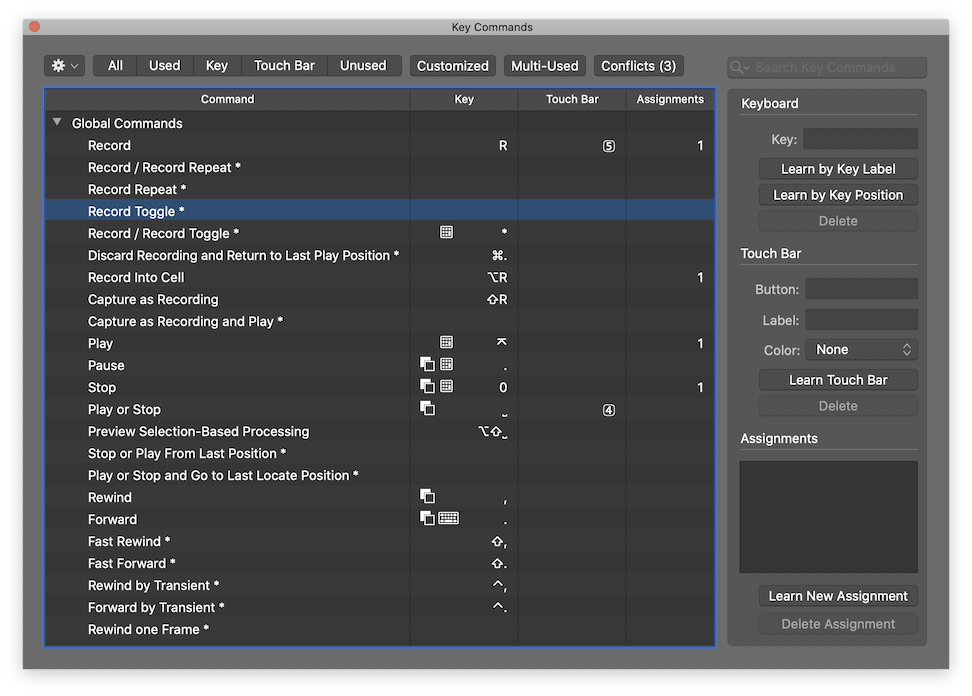
- Open the “Key Commands - Edit” window from the main menu, or use the keyboard shortcut ⌥K.
- Select the command you are interested in, e.g. Record, and then click the button in the bottom right corner <Learn New Assignment>.
- Now press the button on your physical MIDI controller, e.g. the footswitch you want to use to start recording.
That’s it!
Unfortunately, it is impossible to map everything this way. Despite the fact that there are so many commands, they are only general assignments.
Take, for example, Volume – master or track – if you want to control it using the MIDI pedal, this parameter cannot be assigned in this window.
To do this, you need to use another method…
Control Surfaces - Controller Assignments
Although this option is in the Control Surfaces menu, it is universal for any physical MIDI controller, and is not just dedicated to typical Control Surfaces.
Assigning and mapping parameters this way is done as follows:
- Move the slider or knob that you want to assign to the controller, first with the mouse or touchpad. This way, you activate the parameter which will be soon mapped.
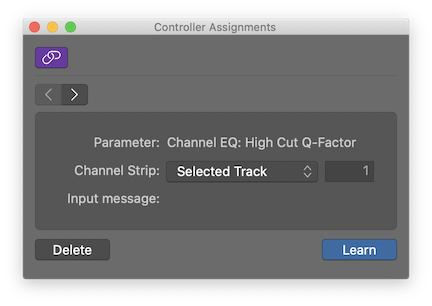
- Then, in the “Control Surfaces” menu, select the option “Learn Assignment for parameter”, or use the key combination ⌘L. The displayed parameter will be the one you triggered earlier with your mouse.
- Now move the slider of the physical controller or the MIDI pedal to assign a parameter to it.
This is how you can map e.g. Master Volume, Track Volume, as well as parameters inside individual plug-ins, both those that are built-in, e.g. Echo Feedback, and in third-party Audio Units.
The possibilities are therefore quite large, but sooner or later you will come across a situation where you cannot assign the parameter you want this way.
Let’s take, for example, the built-in EQ and try to map High Cut Frequency. No matter how you move the mouse, the menu will still display High Cut Q-Factor instead of High Cut Frequency, and it cannot be changed in any way.
To do this, you need to use another method…
Smart Controls - single mapping
The previous ways had one thing in common – the <Learn> button. It will also appear in this method, but in another place.
You will find it in the Smart Controls window (unfortunately these controls are not very smart at all).
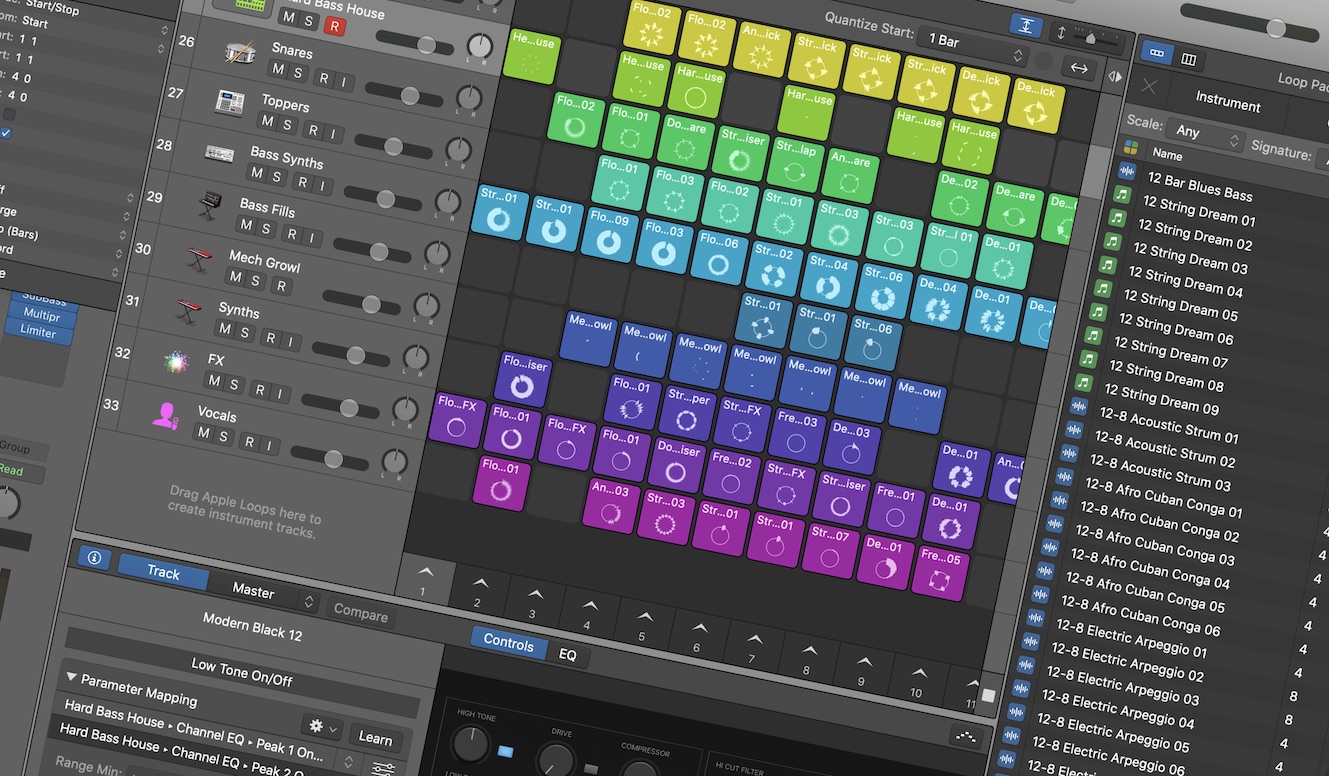
Open this view by clicking the “knob” icon on the toolbar, or select “Show Smart Controls” from the View menu, or simply press the B key.
Let’s start with the visual layout of the parameters.
Click the ⓘ icon to show the Inspector panel.
You will probably see “Automatic Smart Controls” at the top – this is the starting point. You can choose a different Layout (by hovering over this header, you will see that it is a drop-down list – this is not obvious at the beginning).
It is worth experimenting by trying different elements from the list.
Once you have chosen Layout, click on one of the knobs (preferably those marked as “Unmapped”).
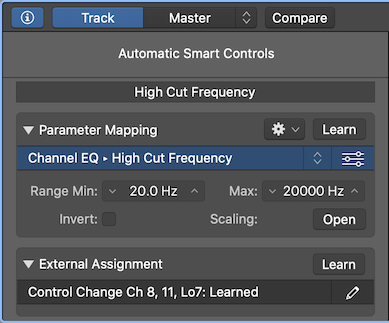
- In Inspector, in the Parameter Mapping section,
- you can click the <Learn> button, but as in the previous method, you won’t get what you want.
- It is better to choose a parameter from the drop-down list, e.g. Channel EQ ▸ High Cut Frequency
- In the External Assignment section, click <Learn> and move the physical controller slider or pedal.
This method of mapping and assigning parameters is the most complicated, but gives the greatest possibilities. It allows to map “invisible” properties, and even assign several different parameters to one controller.
Smart Controls - multiple mapping
Assigning many different parameters, usually from different plug-ins, allows to create very useful parameter combinations that can be controlled with one move (in Ableton it is called Macro).
To define such a set, proceed in the same way as in the previous point.
After mapping and assigning the first parameter, add the second and subsequent parameters as follows:
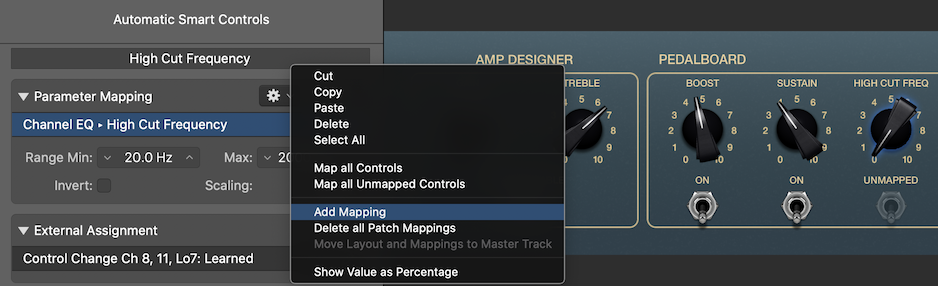
- In Controls, select another knob which is Unmapped.
- In Inspector, in the Parameter Mapping section, click the ⚙ icon and then Add Mapping.
Another drop-down list will appear. Proceed identically as in previous method.
You no longer have to assign a controller because it was done when adding the first parameter.
Thanks to this, by moving the wheel, knob, slider or pedal on your physical MIDI controller, you can control two or more parameters at once.
Many trademark sounds, such as the Wobble effect known from Dubstep, result from modulating a few parameters. The equally well-known Wah-Wah effect is nothing more than a combination of several different EQ attributes: Frequency, Q-Factor and Gain.
By experimenting with many variables at the same time, you may even be able to create a completely new effect.
Till next time.