MIDI Mouth Controller - Connection Guide
To enable sending MIDI events from the MIDI mouth controller app to your Mac via Wi-Fi, Bluetooth or USB, follow the instructions below.
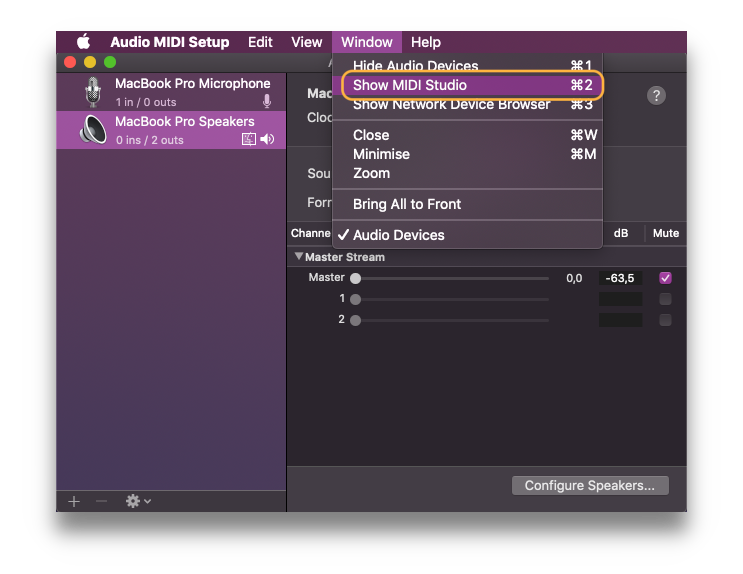
1. On Your Mac, run the built-in "Audio MIDI Setup" application

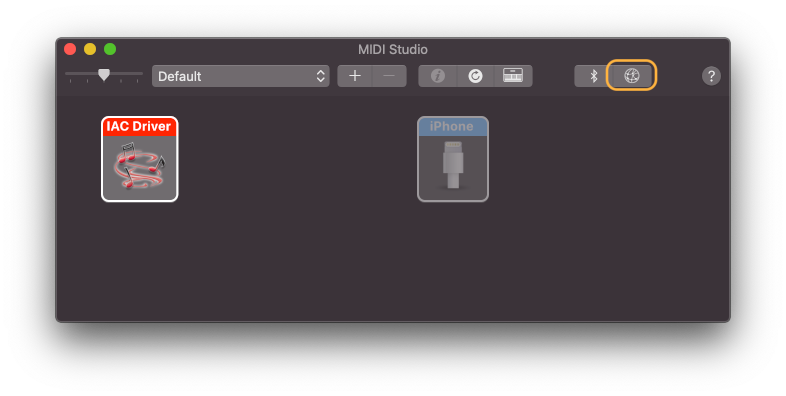
2. Click menu "Window" and select "Show MIDI Studio" (or press ⌘2)
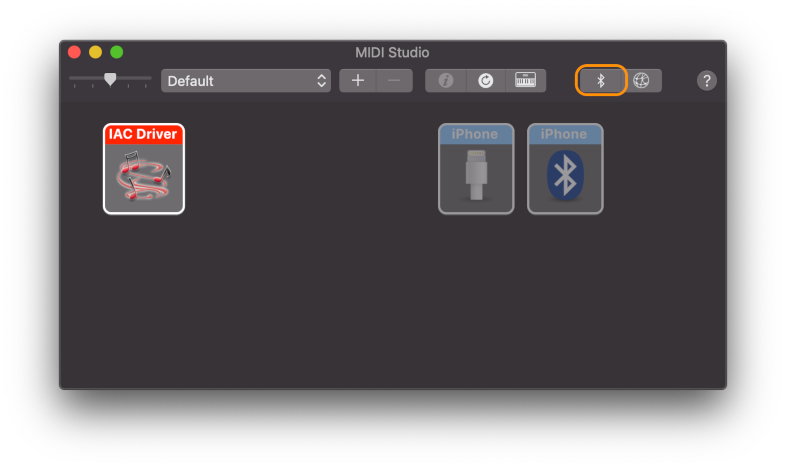
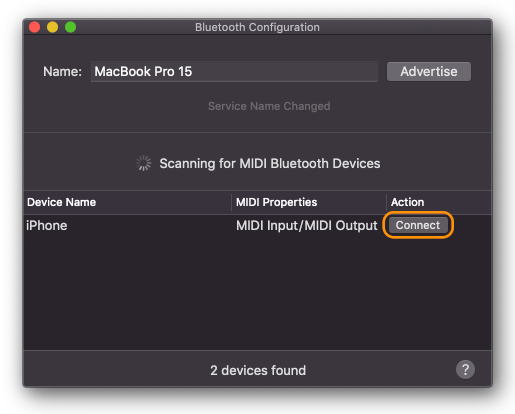
3. Click the "Configure Bluetooth" icon
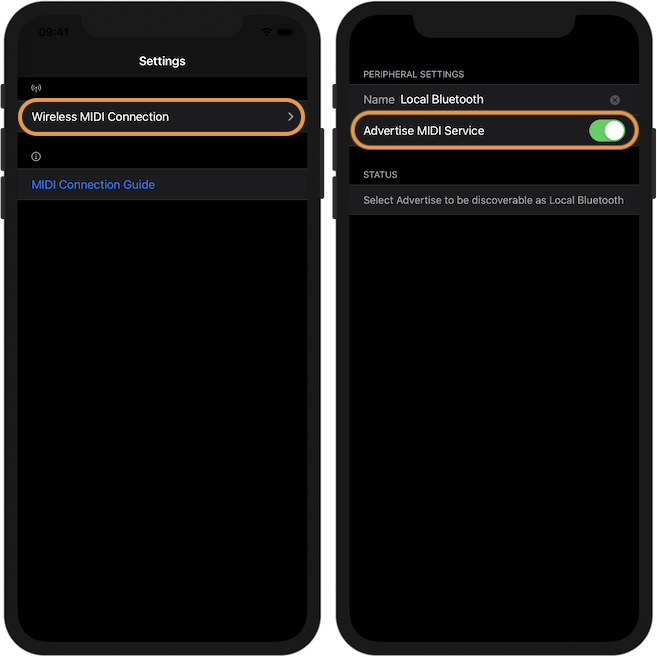
4. Run the MIDI mouth controller app on your iPhone and in "Settings" → "MIDI Bluetooth Connection" tap "Advertise MIDI Service".
5. When the iPhone appears on the list of MIDI devices, press "Connect".
The settings needed to be configured only once before the first connection.
1. On Your Mac, run the built-in "Audio MIDI Setup" application
2. Click menu "Window" and select "Show MIDI Studio" (or press ⌘2)
3. Click the "Configure Network Driver" icon
4. Add a new Session [+] if it hasn't been configured before
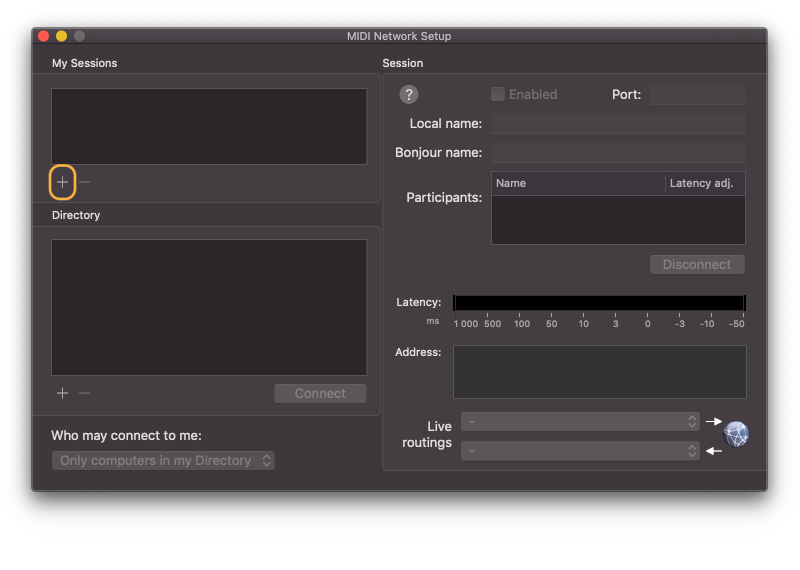
5. Make sure the Session is Enabled
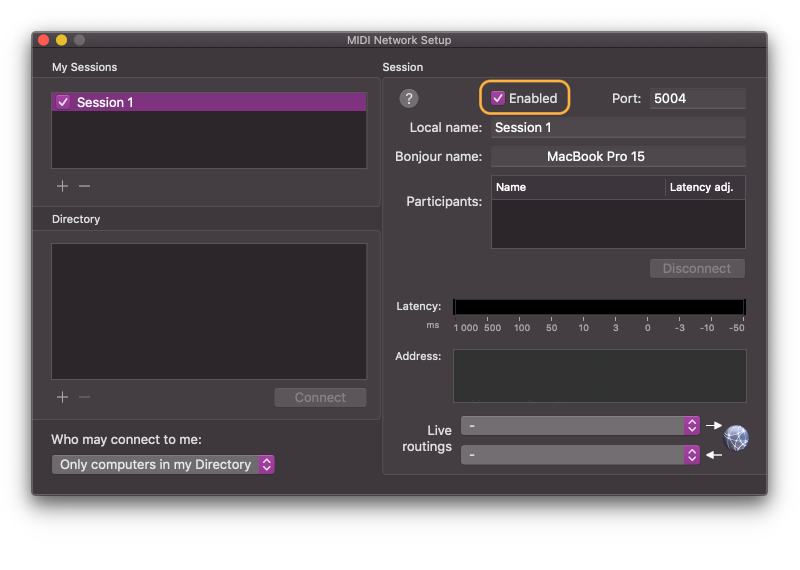
The setting which need to be configured each time before connecting the application with a Mac
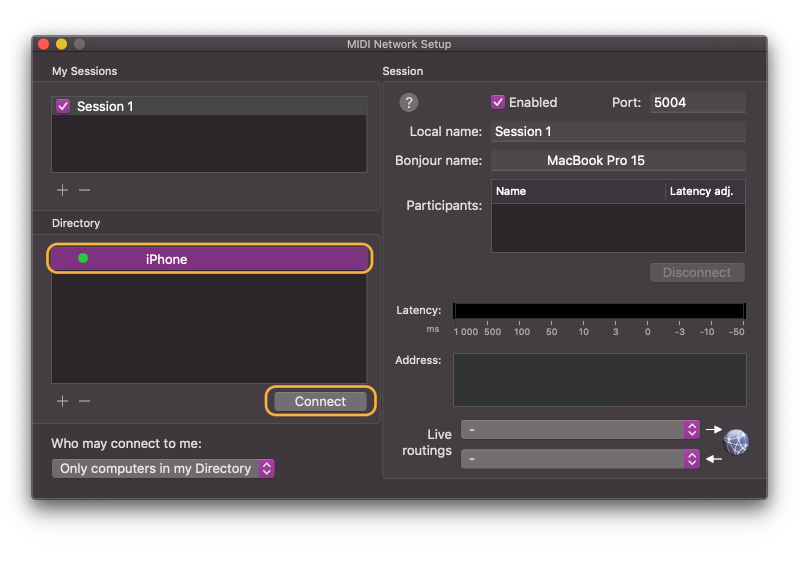
1. Run the MIDI mouth controller app on your iPhone and it should be visible in Directory section. Select it and click Connect.
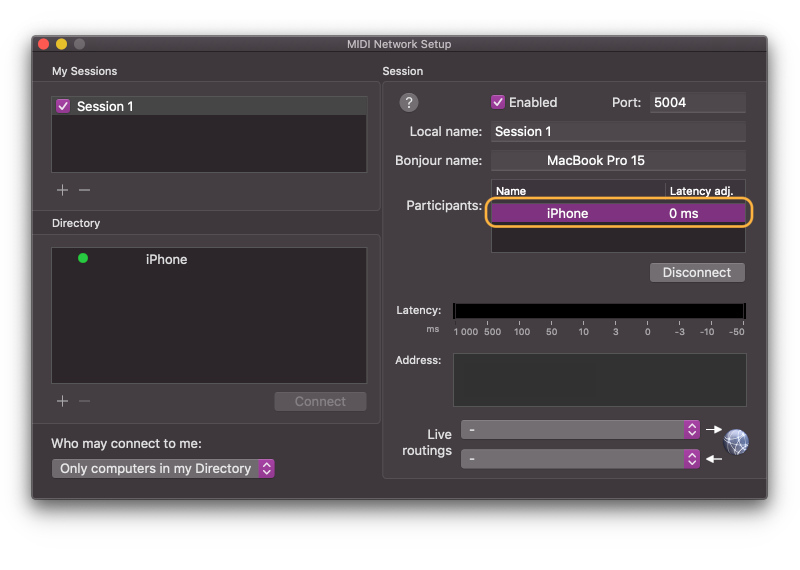
2. Start recording your lips movement using the MIDI mouth controller app on your iPhone and corresponding MIDI events will be sent to your DAW and VST/AU effects on your Mac.
For Windows PCs we recommend using a compatible solution: rtpMIDI.
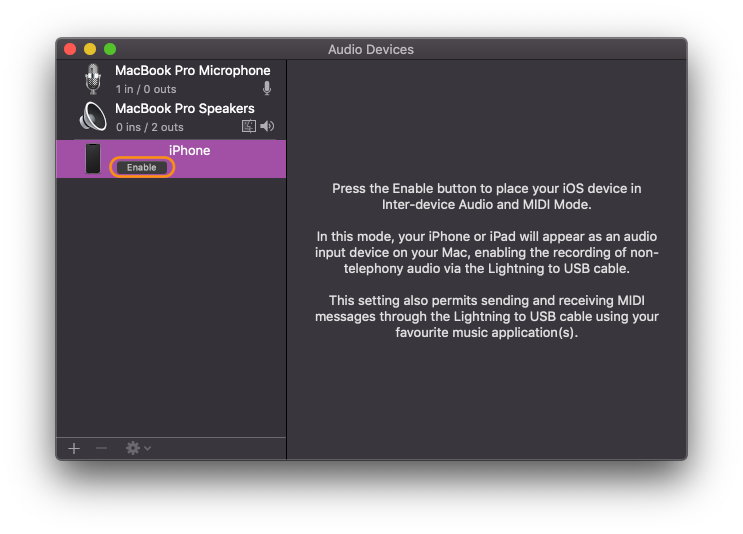
1. On Your Mac, run the built-in "Audio MIDI Setup" application
2. Connect your iPhone to a Mac using a USB cable. When it appears on the list of Audio Devices, press "Enable".